


TL;DR:
- Effective art installations rely on precise spatial planning, proper hardware, and controlled environments to ensure safety and durability. Artists should follow standard height, spacing, and layout guidelines while customizing based on space and artwork needs. Full-scale mock-ups and early collaboration help prevent costly mistakes and improve overall presentation quality.
Art installation best practices are the techniques that determine whether a display succeeds or fails on every level: visual impact, structural safety, and long-term durability. The industry standard centers artwork at 57–60 inches from the floor, maintains a 6–12 inch gap above furniture, and sizes art at two-thirds to three-quarters of the furniture width below it. These are not suggestions. They are the baseline from which every successful installation starts. Whether you are hanging a single canvas or planning a multi-room exhibit, the principles of spatial harmony, structural stability, and methodical preparation apply without exception.
1. What are the essential spatial considerations for successful art installations?
Spatial planning is the single most visible factor in a finished installation. Get it wrong, and even exceptional artwork looks accidental. Get it right, and the entire room feels intentional.
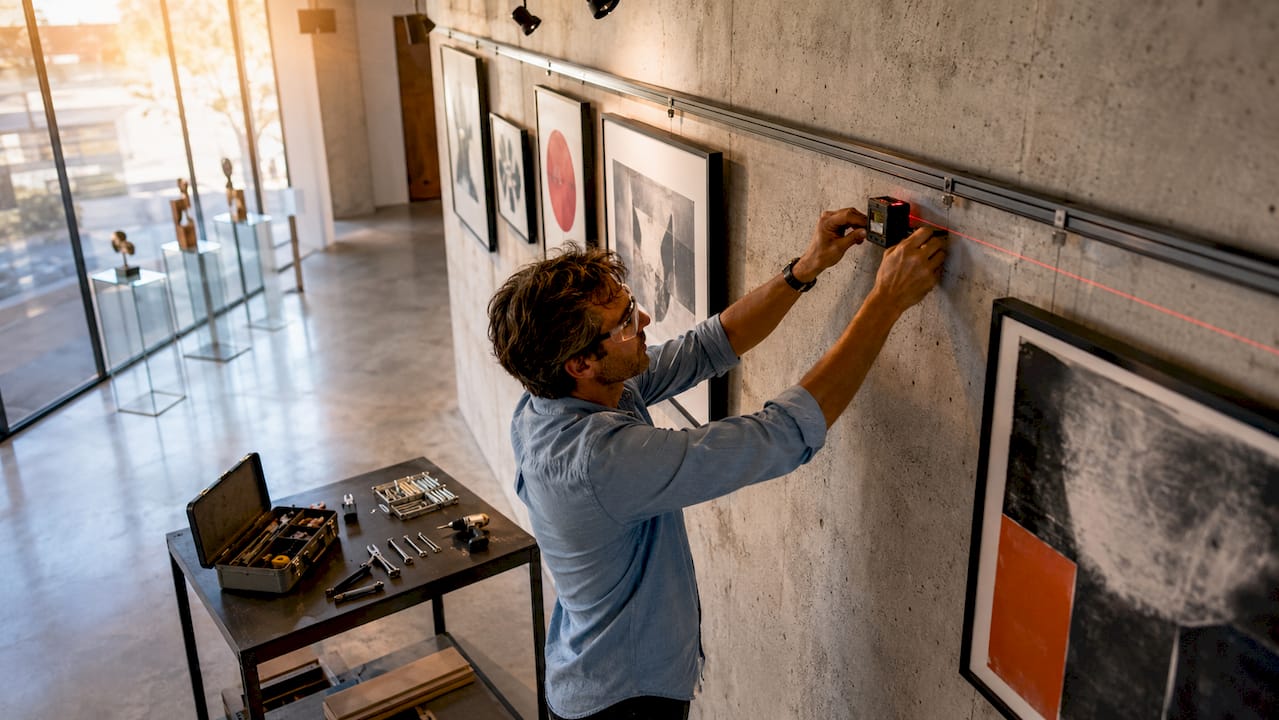
The museum standard for centering artwork sits at 57–60 inches from the floor to the piece’s visual center. This height aligns with the average human eye level and creates a natural viewing experience across diverse audiences. Galleries worldwide use this as their baseline, and you should too.
When hanging art above furniture, maintain a 6–12 inch gap between the top of the furniture and the bottom of the frame. Anything larger breaks the visual connection between the two. Art width should fall between two-thirds and three-quarters of the furniture width beneath it. A sofa that is 84 inches wide calls for artwork in the 56–63 inch range.
For multi-piece installations, spacing discipline matters as much as individual placement. Tight clusters use 2–4 inch gaps between frames, while larger or more formal groupings benefit from 3–6 inch gaps. In hospitality and public spaces, repeating a spacing module every 8–12 feet creates visual rhythm that guides viewers through the space naturally.
Two layout systems dominate professional installations. Grid layouts use uniform spacing and alignment for a clean, orderly feel. Salon-style layouts mix frame sizes and orientations around a central anchor piece, creating energy and depth. Neither is universally superior. The architecture, the artwork, and the audience determine which approach fits.
- Grid layout: Works best in corporate, hospitality, and retail environments where order signals professionalism.
- Salon style: Suits residential, gallery, and creative spaces where variety signals personality.
- Mixed approach: Anchor one large piece at center height, then build outward with smaller works at varied heights within a defined zone.
Pro Tip: Walk the space at normal traffic speed before finalizing placement. Artwork that reads well from a standing position may disappear in a corridor where viewers pass quickly. Adjust centering height down by 2–3 inches in low-ceiling or high-traffic zones.
For deeper guidance on room-specific placement, the room-by-room art styling guide from Artify covers spatial decisions across every common installation environment.
2. How to plan efficiently for complex or large-scale art installations
Planning is where most installations are won or lost before a single nail goes in. Approximately 75% of successful installation work happens during preparation, not execution. That statistic reflects a hard truth: the installation day itself should feel like a rehearsal you have already run.
For large-scale projects, the timeline structure matters as much as the content of the plan.
- Start 16 weeks out for international projects. Customs clearance, crating, and international freight each carry unpredictable delays. Building in 16 weeks creates buffer for every one of them.
- Start 8 weeks out for domestic installations. Domestic logistics move faster, but site inspections, hardware sourcing, and crew coordination still require structured lead time.
- Conduct a formal site inspection. Measure ceiling heights, identify load-bearing walls, map electrical outlets, and document HVAC vent locations. Every one of these affects placement decisions.
- Write a detailed technical proposal. A professional installation proposal documents physical requirements including ceiling grid specifications, electricity access, traffic flow patterns, and contingency plans. It functions as both a planning tool and a liability document.
- Build full-scale mock-ups before drilling. Use painter’s tape or thread to map layout lines on the wall at actual scale. Full-scale mock-ups reveal scaling errors, mirroring mistakes, and HVAC airflow issues that are nearly impossible to detect from a floor plan alone.
- Stagger installation timelines for multi-room projects. Complete and sign off on one zone before moving to the next. This prevents compounding errors across the full installation.
- Plan for the three most common failure points. Customs delays, hardware failure, and human error account for the majority of installation problems. Each needs a named contingency in your plan.
Pro Tip: Photograph your mock-up from the exact viewer positions the audience will use. A layout that looks balanced in your planning sketch can feel crowded or sparse from 10 feet away. The photo test catches this before hardware goes in.
3. What are the best hardware and mounting techniques for stability and preservation?
Hardware selection is a technical decision, not an aesthetic one. The wrong mount damages artwork, injures visitors, or causes structural failure over time.
The wall type determines everything. Drywall requires anchors rated for the specific load, while concrete and masonry handle heavier loads but demand masonry bits and appropriate fasteners. Plaster walls sit between the two and require careful probing to locate lath before drilling. A mounting plan that ignores wall construction is a plan that will eventually fail.
Weight is the clearest decision point. Any piece over 10 pounds requires a stud mount or a rated wall anchor. Drywall nails and standard picture hooks are not rated for that load. For pieces over 30 pounds, locate the stud with a stud finder and drive screws directly into it.
Mounting systems protect artwork by distributing weight across multiple contact points rather than concentrating stress at a single fastener. Inert, archival materials prevent chemical off-gassing that degrades sensitive works over time. This matters most for works on paper, photographs, and mixed-media pieces.
Key hardware considerations by wall type:
- Drywall: Use toggle bolts or rated hollow-wall anchors for pieces up to 50 pounds. Stud mounts for anything heavier.
- Concrete and masonry: Use sleeve anchors or wedge anchors with masonry screws. Pre-drill with a hammer drill.
- Plaster: Probe for lath before drilling. Use lath screws or toggle bolts rated for the load.
- High-traffic and public spaces: Add security hardware such as tamper-resistant screws and locking picture rails to prevent accidental or intentional displacement.
For archival-quality mounting guidance, Artify’s museum-grade wall art guide covers preservation-focused mounting materials in detail.
4. How lighting and environmental factors enhance or impact art installations
Lighting is the most underestimated variable in installation planning. The right light makes colors accurate and textures visible. The wrong light creates glare, washes out detail, or accelerates material degradation.
LED fixtures are the professional standard for art lighting. They produce low heat and minimal UV emission, which protects sensitive materials from fading and warping. Incandescent and halogen fixtures generate heat that damages works over time, particularly photographs and works on paper.
Positioning determines whether lighting enhances or undermines the work. Angle fixtures at 30 degrees from vertical to minimize glare and avoid flat, shadowless illumination. Shadows reveal texture in sculptural and relief works. Glare destroys legibility in photography and works with glossy surfaces.
Environmental factors beyond lighting also affect installation outcomes:
- Humidity: Maintain relative humidity between 45–55% for most works. Fluctuations cause wood panels to warp, canvas to expand and contract, and paper to buckle.
- Airflow: Direct HVAC vents away from suspended or kinetic works. Air currents cause oscillation that stresses mounting hardware and can damage delicate components over time.
- Temperature: Avoid exterior walls in cold climates for temperature-sensitive works. Condensation forms on cold surfaces and migrates into frames and backing materials.
- Natural light: UV-filtering window film protects works near windows without eliminating daylight entirely.
Visual storytelling through art depends on lighting that serves the work rather than competing with it. In hospitality and retail environments, layered lighting with adjustable intensity gives operators control over mood without sacrificing artwork visibility.
Key takeaways
Effective art installation requires spatial precision, structured planning, correct hardware selection, and controlled environmental conditions working together from the start.
| Point | Details |
|---|---|
| Center at eye level | Hang artwork with its visual center at 57–60 inches from the floor as the baseline standard. |
| Plan well in advance | Allow 16 weeks for international and 8 weeks for domestic projects to absorb logistical delays. |
| Match hardware to wall type | Use stud mounts or rated anchors for pieces over 10 pounds; never rely on drywall nails for heavy work. |
| Mock up before drilling | Full-scale tape layouts reveal scaling errors and airflow issues before hardware is committed. |
| Control light and environment | Use LED fixtures angled at 30 degrees and maintain 45–55% relative humidity to protect artwork long-term. |
What I have learned from years of watching installations succeed and fail
The rules in this article are real and they work. But the artists who apply them best treat them as starting points, not scripts. Formula fatigue is a genuine problem in professional installation. It shows up when every piece in a space sits at exactly 60 inches, every gap is precisely 4 inches, and the result feels like a catalog page rather than a curated environment.
The standard centering height exists because it works for most viewers in most spaces. Experienced installers adjust that formula based on ceiling height, viewer sightlines, and architectural context. A 10-foot ceiling in a gallery calls for a different center point than a standard 8-foot residential room. The rule gives you a foundation. The space tells you where to go from there.
The single most overlooked practice is the full-scale mock-up. Artists skip it because it feels redundant. It is not. A tape layout on the wall takes 20 minutes and has saved countless installations from costly corrections. I have seen suspended works that oscillated in HVAC airflow, gallery walls where the planned layout mirrored incorrectly, and large-scale pieces that were simply the wrong scale for the room. Every one of those problems was visible in the mock-up stage and invisible on the floor plan.
Collaboration also matters more than most artists expect. The best installations I have seen came from artists, installers, and curators working from the same technical proposal. When everyone shares the same document, surprises on installation day drop dramatically. Write the proposal. Share it early. Update it after the site inspection.
— Artify
Artify’s resources for artists planning their next installation
Artists who want to move from planning to execution with confidence have a clear next step.
Artify’s pre-made collections offer curated artworks already sized and prepared for diverse installation environments, from residential walls to hospitality corridors. Each piece is produced to gallery-quality standards, which simplifies the selection process when you need work that fits specific spatial requirements. The artist signup program connects independent artists with collaboration opportunities, technical resources, and a community of practitioners who take installation seriously. If you are building toward a larger exhibit or a public installation, Artify’s platform gives you the infrastructure to support it.
FAQ
What height should artwork be hung at?
Center artwork at 57–60 inches from the floor to its visual midpoint. This aligns with average eye level and matches the standard used by professional galleries and museums.
How far in advance should I plan a large art installation?
Allow at least 16 weeks for international projects and 8 weeks for domestic installations. This timeline accounts for customs clearance, hardware sourcing, site inspections, and contingency planning.
What hardware do I need for heavy artwork?
Any piece over 10 pounds requires a stud mount or a rated wall anchor. Drywall nails are not rated for that load and will fail over time, especially in high-traffic or public spaces.
Why are full-scale mock-ups worth the effort?
Mock-ups using painter’s tape or thread reveal scaling errors, incorrect mirroring, and HVAC airflow issues before hardware is installed. Fixing these problems after drilling is significantly more costly and time-consuming.
What lighting type is best for art installations?
LED fixtures are the professional standard. They produce low heat and minimal UV output, which protects artwork materials from fading and warping over time.