

TL;DR:
- A gallery wall is a curated collection of art, photographs, and objects arranged on a single wall to create a personalized focal point. Effective layout combines intentional spacing, balanced visual weight, and cohesive color palettes, whether in rental or owned spaces. Planning with templates, anchoring around a focal piece, and proper lighting enhance its visual impact and adaptability over time.
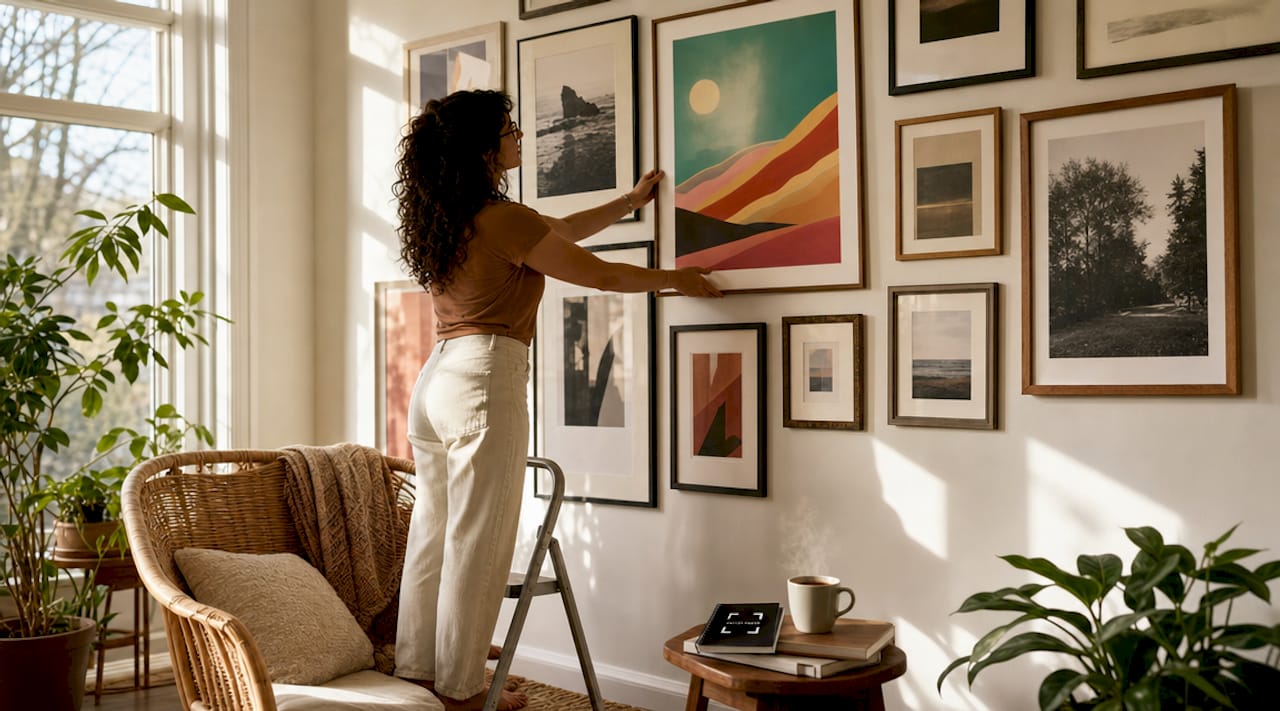
A gallery wall is a curated collection of framed art, photographs, and decorative objects arranged cohesively on a single wall to create a personalized focal point. Done well, it turns a blank surface into the most expressive corner of your home. Whether you rent a studio apartment or own a four-bedroom house, the right gallery wall ideas give any room a sense of intention and character that no single piece of art can match alone.
1. Popular gallery wall styles and when to use each
The five core gallery wall styles each serve a different room type and personality. Knowing which one fits your space is the first decision in any gallery wall design process.
| Style | Best room | Key feature | Ideal for |
|---|---|---|---|
| Grid | Home office, bedroom | Uniform frames, equal spacing | Minimalists, renters |
| Salon-style | Living room, dining room | Mixed sizes, organic arrangement | Collectors, maximalists |
| Symmetrical | Entryway, hallway | Mirrored layout, balanced pairs | Traditional decor |
| Asymmetrical | Living room, staircase | Varied sizes, deliberate imbalance | Modern, eclectic decor |
| Themed | Kids’ room, study | Unified subject or color story | Storytellers, families |
The grid style works best when you want a clean, modern result with minimal visual noise. Salon-style layouts, by contrast, evolve organically over time, making them ideal if you plan to add pieces gradually. Symmetrical arrangements suit formal spaces like entryways, while asymmetrical designs bring energy to larger living room walls.
Pro Tip: Mix a grid cluster with a salon-style overflow on one side. It gives you the structure of a grid with the personality of a salon layout, and it reads as intentional rather than accidental.
2. Essential spacing rules every layout needs
Spacing is the single most misunderstood variable in gallery wall arrangement tips. Frame spacing ranges from 1 to 6 inches depending on the style you choose. A 2 to 3 inch gap creates a crisp, balanced look that works across most styles. Tighter spacing of 1 to 1.5 inches reads as modern and dense, while 4 to 6 inches creates an airy, editorial feel suited to large walls with bold prints.
Consistent spacing signals control. Inconsistent spacing signals accident. Pick one measurement and apply it throughout the arrangement, even if your frames vary in size.
3. The 2/3 rule for furniture-anchored walls
The most common gallery wall mistake is sizing the arrangement wrong relative to the furniture below it. A gallery wall above a sofa or console should span roughly two-thirds the width of that furniture piece. This proportion creates a visual connection between the wall and the furniture, making both feel intentional rather than random.
For a standard 84-inch sofa, that means your gallery arrangement should span approximately 56 inches. Going wider makes the wall feel disconnected from the furniture. Going narrower makes the sofa feel oversized and the wall feel sparse.
4. Visual weight and how to balance your composition
Visual weight is as important as physical size when balancing a gallery wall. A large, dark frame in one corner pulls the eye so strongly that it destabilizes the entire arrangement. Counterbalance it with a cluster of smaller, lighter frames on the opposite side rather than a single large piece.
Dark frames, high-contrast prints, and bold colors all carry more visual weight than light wood frames, watercolors, or line drawings. Distribute heavy and light pieces the way a chef balances flavors: no single element should dominate without something else holding the other side. Balancing visual weight consistently outperforms strict symmetry as a design strategy.
5. How to plan your layout before touching a wall
Paper templates are the most underused tool in the gallery wall design process. Tape paper cutouts of each frame to the wall before hammering a single nail. This lets you test spacing, proportion, and composition in real time without any commitment. Painter’s tape works equally well for sketching out the outer boundary of the arrangement.
Lay all your frames on the floor first to experiment with placement. Photograph the floor layout before moving anything to the wall. Apps like Canva or RoomSketcher let you mock up arrangements digitally if you prefer a screen-based preview. Either method saves you from unnecessary holes and the frustration of a crooked final result.
Pro Tip: Trace each frame onto kraft paper, cut it out, and label the hanging hardware position on the back. When you tape the template to the wall, you can mark the exact nail position through the paper before removing it.
6. Building around an anchor piece
Every gallery wall needs a visual anchor, which is the largest or boldest piece in the arrangement. Place the anchor first, near the center of the intended space, then build outward from it. This approach prevents the common mistake of placing all your favorite pieces first and then struggling to fill the gaps with whatever remains.
The anchor does not have to be the largest frame. A high-contrast black and white photograph in a 16x20 format can anchor a wall more effectively than a 24x30 painting in muted tones. Think of the anchor as the piece that earns the most attention, then let every other piece support it.
7. Creative gallery wall ideas for cohesion across mixed art
Limiting your color palette is the fastest way to achieve a professional look even when mixing art styles, frame sizes, and media types. Choose two or three dominant colors that appear across multiple pieces, and the arrangement will read as curated rather than cluttered.
Here are four approaches that work across different tastes and budgets:
- Unified mat colors: Consistent white or off-white mats across all frames tie together pieces with different finishes and subjects. This is the single easiest way to unify a mixed collection.
- Mixed media with one material anchor: Combine photographs, art prints, and small mirrors or woven wall hangings, but keep all frames in one finish, such as black, brass, or natural wood.
- Themed subject matter: Group pieces by subject, such as botanical prints, travel photography, or abstract works in one color family. Melanin Art’s approach to grouping art by subject shows how thematic cohesion creates powerful, identity-driven displays.
- Renter-friendly lightweight pieces: Canvas prints, unframed art prints with clips, and lightweight acrylic panels work with removable hanging strips and avoid lease violations.
8. Renter-friendly hanging solutions that actually hold
Removable hanging strips like Command strips provide a damage-free option for renters with light to medium-weight frames. Most strips hold up to 16 pounds per pair when applied correctly to clean, dry walls. For heavier frames, picture rail hooks or tension rod systems mounted in doorframes offer no-drill alternatives.
The key limitation is weight. Removable strips are not suitable for frames heavier than 5 to 6 pounds each. For a gallery wall with a mix of weights, use multiple hanging methods tailored to each frame. Lightweight prints get strips, medium frames get adhesive hooks, and any anchor piece over 8 pounds gets a traditional nail or wall anchor if your lease permits.
9. Staircase, hallway, and bedroom gallery wall ideas
Staircases demand a diagonal arrangement that follows the angle of the steps. Keep the center line of your frames parallel to the stair angle, and maintain consistent spacing between pieces. A mix of portrait and landscape orientations adds rhythm to a staircase wall without making it feel chaotic.
Hallways benefit from a single horizontal row of frames at eye level, typically 57 to 60 inches from the floor to the center of each frame. This is the standard museum hanging height and it works because it places art at the natural focal point of a standing viewer. Bedrooms suit softer, more personal arrangements: family photographs, travel prints, and art in warm tones above the headboard create a calming, intimate focal point.
10. Lighting your gallery wall for maximum impact
Lighting transforms a gallery wall from flat to dimensional. Picture lights mounted directly on frames work well for anchor pieces. Track lighting or adjustable ceiling spotlights let you direct light across the entire arrangement. Warm white bulbs in the 2700K to 3000K range bring out the warmth in wood frames and photographic prints without washing out color.
Avoid placing gallery walls directly opposite large windows. Natural light creates glare on glass-covered frames and causes photographic prints to fade over time. If the wall opposite a window is your only option, use UV-protective glass or acrylic glazing on any pieces you want to preserve long-term.
11. Maintaining and evolving your gallery wall over time
A gallery wall is not a permanent installation. Treat it as a living display that reflects where you are right now, with room to grow. Salon-style layouts are specifically designed to accommodate new additions without requiring a full redesign. Leave intentional gaps in your initial arrangement so you can add pieces without disrupting the composition.
Rotate seasonal pieces, swap out prints that no longer resonate, and update frames as your style evolves. The best gallery walls in 2026 are personal archives, not static decorations. Photograph your current arrangement before making changes so you have a reference point if you want to return to a previous version.
Key takeaways
A gallery wall succeeds when intentional layout, balanced visual weight, and a cohesive color palette work together as a system rather than as individual decisions.
| Point | Details |
|---|---|
| Anchor piece first | Place the boldest or largest frame first, then build the arrangement outward from it. |
| Follow the 2/3 rule | Keep your gallery width at two-thirds the width of any furniture below it for balanced proportions. |
| Spacing determines style | Use 2 to 3 inches for a balanced look, tighter for modern density, wider for an airy editorial feel. |
| Unify with mats or palette | Consistent white mats or a limited color palette ties together mixed art styles and frame finishes. |
| Renters have real options | Removable strips and lightweight frames make damage-free gallery walls fully achievable in any rental. |
What I’ve learned from building hundreds of gallery walls
Most people approach a gallery wall the way they approach a junk drawer: they collect things they like and then wonder why it looks like a mess. The real work is subtraction, not addition. The most striking gallery walls I’ve seen contain fewer pieces than the homeowner originally planned, with more breathing room between them.
The advice I give most often is this: decide what the wall is for before you buy a single frame. Is it a family archive? A travel record? A color story that ties the room together? That answer shapes every decision that follows, from frame finish to art style to spacing. Gallery wall design success comes from intentionality, not accumulation.
I also think the renter-versus-homeowner distinction is overblown. Renters have more options than they realize. Lightweight canvas prints, removable strips, and pre-curated collections from Artify mean you can build a gallery wall that looks permanent without touching a single load-bearing wall. The constraint of not drilling actually pushes you toward lighter, more considered choices, which often produces better results than the anything-goes approach homeowners sometimes fall into.
One more thing: do not wait until you have the “right” collection to start. Begin with three pieces you love, hang them well, and let the wall grow from there. A gallery wall that evolves over years tells a more interesting story than one assembled in an afternoon.
— Artify
Build your gallery wall with Artify
Artify makes the hardest part of the gallery wall design process easier: finding art that actually works together. The pre-made collections are curated specifically for cohesive wall displays, with consistent framing options and sizes designed to pair well across a single arrangement.
Every piece ships ready to hang, with framing options that suit both renters and homeowners. You can browse the full art catalog to find prints across dozens of styles, from bold abstract works to photography collections inspired by landmarks and culture. If you want to understand the full ordering and framing process before committing, the how it works page walks you through every step from upload to delivery.
FAQ
What is the ideal spacing between gallery wall frames?
Spacing of 2 to 3 inches between frames creates the most balanced and versatile gallery wall look. Tighter spacing of 1 to 1.5 inches suits modern styles, while 4 to 6 inches works for airy, editorial arrangements.
How wide should a gallery wall be above a sofa?
The gallery arrangement should span roughly two-thirds the width of the sofa or furniture piece below it. For a standard 84-inch sofa, that means an arrangement approximately 56 inches wide.
Can renters create a gallery wall without damaging walls?
Yes. Removable hanging strips like Command strips hold light to medium frames without leaving permanent damage. Pairing lightweight canvas prints with adhesive hooks gives renters a full gallery wall with no lease violations.
Where do you start when hanging a gallery wall?
Start with the anchor piece, which is the largest or most visually dominant frame. Place the anchor first near the center of the intended space, then build outward, balancing visual weight as you go.
How do you make a gallery wall look cohesive with mixed art?
Limit your color palette to two or three dominant colors across all pieces, and use consistent mat colors or frame finishes throughout. These two constraints unify even the most diverse collection of art styles and sizes.