


TL;DR:
- A museum-grade art workflow is a verified process that ensures high archival standards for materials and color fidelity. Proper materials, calibration, and documentation are essential for consistent, long-lasting results. Patience and discipline in procedure prevent failures and uphold quality over time.
A museum-grade art workflow is the process of producing fine art reproductions and presentations that meet archival standards for visual fidelity, material durability, and professional consistency. The term “museum quality” gets used loosely in marketing, but the industry standard defines it as a verifiable, repeatable process with documented workflows and periodic reassessment. For artists, art students, and professionals, mastering this workflow means every piece you produce can stand up to institutional scrutiny, collector expectations, and the test of time. This guide covers every stage, from materials selection and color calibration to quality control and long-term preservation, using current 2026 best practices aligned with ISO 9706 and ASTM archival standards.
What materials and tools does a museum-grade art workflow require?
The foundation of any museum-grade art workflow is materials selection. Cutting corners here makes every later step harder to get right.
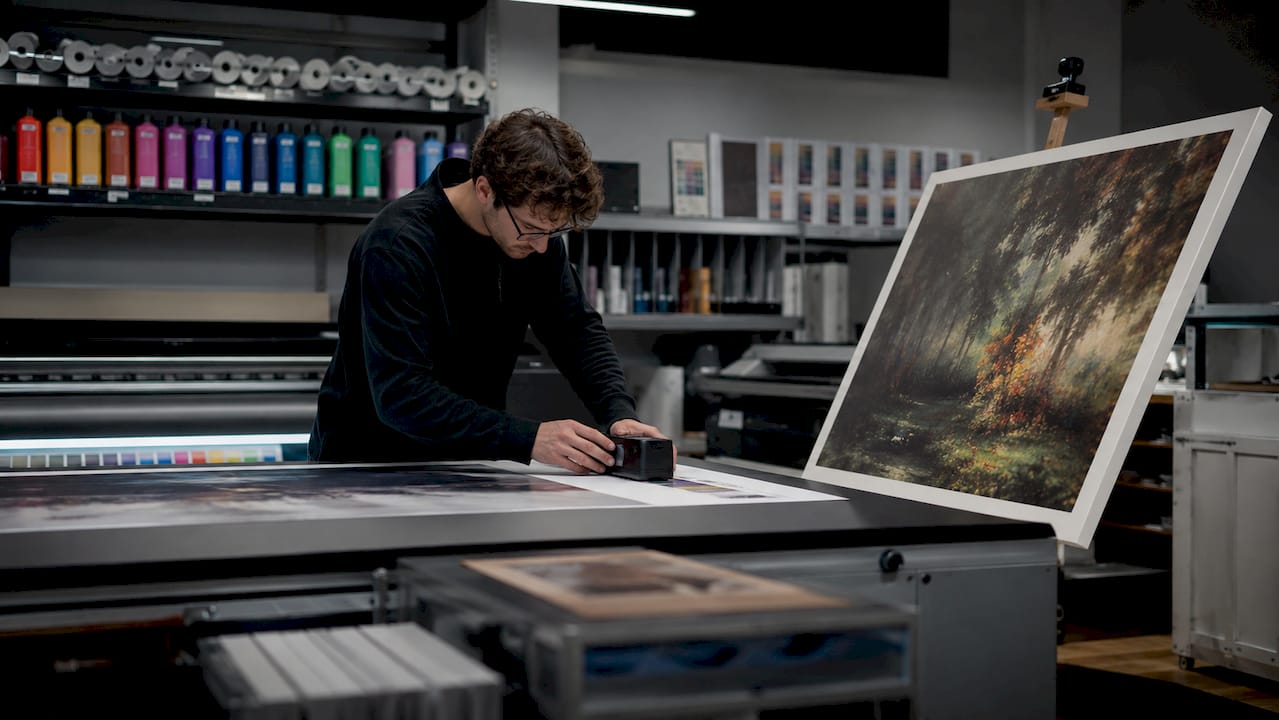
Canvas and paper specs
Museum-grade canvas printing requires 340–380 gsm cotton canvas and a printing resolution between 720 and 1440 dpi. That weight range provides the structural integrity needed for long-term display without warping or sagging. For fine art paper prints, acid-free and lignin-free substrates are non-negotiable. Lignin breaks down over time and causes yellowing, which disqualifies a work from any serious archival classification.
Paints and inks
Professional artist-grade oil paints use higher pigment loads than student-grade alternatives. That pigment density directly affects color saturation and lightfastness over decades. For digital canvas prints, pigment-based inks outperform dye-based inks in UV resistance and archival longevity. Dye inks can fade noticeably within a few years under gallery lighting conditions.
Printing and calibration tools
Custom ICC profiles and spectrophotometer calibration are required for reliable color accuracy. Manufacturer ICC profiles are insufficient for museum-grade accuracy because they do not account for your specific ink, paper, and environmental conditions. A spectrophotometer measures actual color output and generates a profile matched to your exact setup.
| Material/Tool | Specification | Why It Matters |
|---|---|---|
| Cotton canvas | 340–380 gsm | Structural stability and archival longevity |
| Print resolution | 720–1440 dpi | Fine detail reproduction without pixelation |
| Paper substrate | Acid-free, lignin-free | Prevents yellowing and degradation |
| Inks | Pigment-based | Superior UV resistance and lightfastness |
| Color profiling | Custom ICC v4 profiles | Accurate, repeatable color output |
Pro Tip: Always test a new paper or canvas substrate with a printed color target before committing to a full production run. One test print saves you from an entire batch with shifted color.
How does color management ensure museum-quality reproduction?
Color management is where most artists lose ground on quality. A technically perfect painting or scan means nothing if the output colors drift from the original.
- Set up D50 viewing conditions. D50 is the standard illuminant for color-critical work, simulating average daylight at 5,000 Kelvin. Evaluating prints under any other light source introduces a perceptual shift that makes accurate color matching impossible.
- Calibrate your monitor. A color-managed monitor with a hardware calibration device keeps your display aligned with your output profile. Without this, what you see on screen and what prints are two different things.
- Build custom ICC v4 printer-paper profiles. Custom printer-paper ICC profiles generated with spectrophotometer measurements are necessary for reliable museum-grade color accuracy. Run a full profiling target, measure it, and build the profile in profiling software like X-Rite i1Profiler or Barbieri Spectro LFP.
- Soft-proof before printing. Soft-proofing simulates how your file will look on a specific paper and ink combination. This step catches gamut warnings before you waste materials on an out-of-range print.
- Measure ΔE00 on final output. Critical tonal accuracy requires color differences ΔE00 less than 1.5 in key areas and a whole-image average ΔE00 less than 2.5. ΔE00 is the industry-standard unit for measuring the difference between a target color and a printed color. A score below 1.5 means the difference is imperceptible to the human eye.
- Document QC metrics in certificates of authenticity. Include the ΔE00 scores, ICC profile name, paper batch, and ink set in every certificate. This documentation is what separates a professional workflow from a production run.
Pro Tip: Print a color control strip along the edge of every production sheet. Measure it after printing and keep a log. If your ΔE scores drift over time, you catch calibration drift before it affects client work.
What are the step-by-step stages in the museum-quality art process?
A structured sequence prevents errors from compounding across stages. Whether you are producing an original oil painting or a digital canvas print, the stages follow the same logic.
- Sketch and composition layout. Use proportional grids or digital layout tools to establish accurate scale before any paint or ink touches the substrate. Proportion errors at this stage are nearly impossible to correct later without starting over.
- Tonal underpainting. For oil paintings, a monochromatic underpainting establishes the full value range before color layers begin. This stage defines the light structure of the entire piece.
- Fat over lean layering. The fat over lean principle prevents cracking during oil curing by ensuring each successive layer has a higher oil content than the one below it. Reversing this ratio causes the lower layers to dry faster than the upper ones, which creates stress fractures over time.
- Detailing, glazing, and impasto. Museum-grade oil reproductions rely on paint topography and authentic impasto that affect how light interacts with the artwork. Glazing with transparent layers builds luminosity that flat opaque paint cannot replicate.
- High-resolution digital printing steps. For canvas prints, flatten and sharpen the digital file appropriately for the output size, apply the correct ICC profile, and print with color management set to “Printer Manages Colors” disabled. Let the RIP software or print driver handle the profile conversion.
- Drying and curing. Museum-grade oil painting reproductions require 20–30 days of active painting and an additional 7–14 days for drying, QC, and shipping. That timeline reflects the reality of proper curing, not a production delay.
- Archival varnishing. Apply a UV-blocking archival varnish only after full curing. Varnishing too early traps solvents and causes clouding or adhesion failure.
- Final inspection. Check surface integrity, color accuracy against the reference, and edge finishing before packaging.
Pro Tip: For oil paintings, rushing drying with heat damages oil paint molecular integrity and reduces archival stability. Natural air drying in a dust-free environment is the only method that preserves long-term quality.
How do you perform quality control for museum-grade works?
Quality control is not a final check. It is a series of checkpoints built into every stage of production.
Core QC checkpoints to run at each stage:
- Color accuracy: Measure ΔE00 against the reference file or original artwork at the proofing stage and again on the final output.
- Surface integrity: Inspect for delamination, cracking, uneven varnish, or print artifacts under raking light.
- Scale and proportion: Confirm final dimensions match the specification sheet within acceptable tolerance.
- Brushstroke and print detail: For oil paintings, compare impasto texture to the reference. For prints, check fine line reproduction at 100% zoom and on the physical output.
- Edge and mounting: Verify canvas wrap tension, staple placement, and frame squareness.
Consistency is maintained through formal specification sheets detailing paper weights, ink sets, and ΔE targets. These sheets make your workflow repeatable across batches and across team members. Photo documentation at each checkpoint creates a digital record that supports client approvals and dispute resolution.
Client approval works best with a structured digital proofing process. Send a calibrated soft-proof PDF with embedded color profile information, and request written sign-off before proceeding to final production. This step protects both you and the client.
Pro Tip: Keep a physical archive of test prints from each paper and ink batch. When a client questions color accuracy months later, you have a physical reference that matches the production record.
What best practices protect museum-quality art long-term?
Producing a great piece is only half the work. How you store, frame, and maintain it determines whether it lasts decades or deteriorates within years.
- Use archival UV-blocking varnishes. UV radiation is the primary cause of color fading in both oil paintings and pigment prints. A UV-blocking varnish or glazing material reduces this exposure significantly.
- Frame with acid-free mats and kiln-dried wood stretchers. Acid migration from non-archival mat board discolors works over time. Kiln-dried wood resists warping and off-gassing that can damage canvas.
- Control storage conditions. Store works at 45–55% relative humidity and 60–70°F. Fluctuations outside this range cause expansion and contraction cycles that stress paint layers and canvas fibers.
- Limit light exposure during storage. Even low-level ambient light causes cumulative fading. Store unframed works in archival sleeves or flat files away from direct light.
- Schedule regular inspections. Check stored works every six months for signs of mold, pest activity, or structural changes. Early detection prevents irreversible damage.
- Choose sustainable conservation materials. Modern heritage science moves toward sustainable, low-toxicity materials like cellulose ethers and nanocelluloses for art conservation. These materials align archival permanence with environmental responsibility, which matters increasingly to institutions and collectors. Artify’s approach to eco-friendly art practices reflects this same shift in the industry.
Key Takeaways
A museum-grade art workflow requires matched materials, calibrated color management, structured production stages, and documented QC to produce work that meets archival standards consistently.
| Point | Details |
|---|---|
| Materials set the ceiling | Use 340–380 gsm cotton canvas, acid-free substrates, and pigment-based inks as the baseline. |
| Color management is measurable | Target ΔE00 below 1.5 in critical areas using custom ICC profiles and spectrophotometer calibration. |
| Fat over lean prevents failure | Apply this layering principle in oil paintings to prevent cracking during multi-week curing. |
| Documentation makes it repeatable | Formal spec sheets with ΔE targets and batch records are what separate a workflow from a one-off. |
| Preservation extends the work | Control humidity at 45–55%, use UV-blocking varnishes, and inspect stored works every six months. |
What I’ve learned from watching artists skip the hard parts
The most common mistake I see is treating “museum quality” as a materials upgrade rather than a process discipline. Artists buy the right canvas and the right paints, then rush the drying stage or skip color profiling because it feels like overhead. The result looks good on delivery day and starts failing within two years.
The second mistake is underestimating documentation. A premium wall art workflow without written specs is not a workflow. It is a series of good decisions that you cannot repeat reliably. The artists who produce consistently excellent work keep records that would satisfy a conservator. They know the paper batch, the ink set, the ΔE scores, and the varnish product for every piece they have ever made.
The third thing I have learned is that patience is not a soft skill in this context. Oil paint dries by oxidation. That process takes weeks, and no amount of heat or airflow speeds it up without damaging the molecular bonds that give the paint its long-term stability. The workflow timeline exists because the chemistry demands it, not because anyone is being precious about the work.
Invest in the process as seriously as you invest in the materials. The two are inseparable.
— Artify
How Artify supports your museum-quality art production
Artify is built for artists who take production quality seriously. Whether you are preparing original works for gallery submission or ordering archival canvas prints for clients, Artify’s ordering and delivery process is designed to maintain presentation standards from production through to the collector’s wall.
Artify handles on-demand printing on archival-grade substrates, with packaging that protects surface integrity during transit. Artists working at a professional level can also explore how Artify works to support independent creators with print fulfillment, framing options, and curated collections. If you are ready to put your work in front of collectors who expect museum-quality presentation, Artify gives you the production infrastructure to deliver it consistently.
FAQ
What is a museum-grade art workflow?
A museum-grade art workflow is a documented, repeatable production process that meets archival standards for materials, color fidelity, and structural durability. It covers every stage from substrate selection and color profiling to varnishing, QC, and storage.
What canvas weight is required for museum-quality prints?
Museum-quality canvas prints require 340–380 gsm cotton canvas printed at 720–1440 dpi. This weight and resolution combination provides the structural stability and fine detail needed for long-term display.
Why does fat over lean matter in oil painting?
The fat over lean principle requires each successive paint layer to have a higher oil content than the layer below it. Reversing this ratio causes lower layers to dry faster than upper ones, creating stress fractures that compromise archival stability.
What ΔE00 score indicates museum-grade color accuracy?
A ΔE00 score below 1.5 in critical tonal areas and below 2.5 as a whole-image average meets the threshold for museum-grade color fidelity. Scores in this range represent differences imperceptible to the human eye.
How long does a museum-grade oil painting reproduction take?
A full museum-grade oil painting reproduction takes 4–6 weeks total, including 20–30 days of active painting and 7–14 days for drying, quality control, and shipping.