


TL;DR:
- Art mounting attaches artwork to a support to ensure stability and prevent damage over time. Different methods, such as hinge, float, dry, or plexi-face mounting, serve specific preservation and aesthetic needs. Using archival, reversible materials is essential for protecting valuable or original pieces during display and framing.
Art mounting is defined as the process of attaching artwork to a secondary support to provide stability, prevent damage, and prepare it for display. Whether you are framing a watercolor print, a family photograph, or an original oil painting, the mounting method you choose directly affects how long the piece lasts and how it looks on your wall. The two broad categories are permanent (non-reversible) and archival (reversible) techniques, each suited to different artwork types and display goals. Understanding what is art mounting gives you the knowledge to protect your pieces and present them at their best.
What is art mounting and why does it matter?
Art mounting is the process of attaching artwork to a secondary support to provide stability and prevent damage. That definition comes from professional conservation practice, and it carries real weight. Without a proper mount, paper-based artwork bends, buckles, and shifts inside a frame. Over time, that physical stress causes creasing, tearing, and discoloration that no amount of careful cleaning can reverse.
The standard industry term is “mounting,” and it covers everything from a simple hinge of Japanese tissue paper to a full dry-mount press used in commercial framing shops. The phrase “art mounting” is how most home decorators search for this information, but the underlying craft is the same. Knowing both terms helps you communicate clearly with framers and find the right supplies.
Mounting also creates the visual foundation for how art reads in a room. A well-mounted piece sits flat, stays centered, and holds its position for years. A poorly mounted piece shifts, warps, and eventually looks neglected, no matter how beautiful the artwork itself is.
What are the main art mounting techniques?
Different mounting methods serve different goals: preservation, aesthetic presentation, or both. Choosing the right one depends on the artwork’s value, fragility, and how long it will be on display.
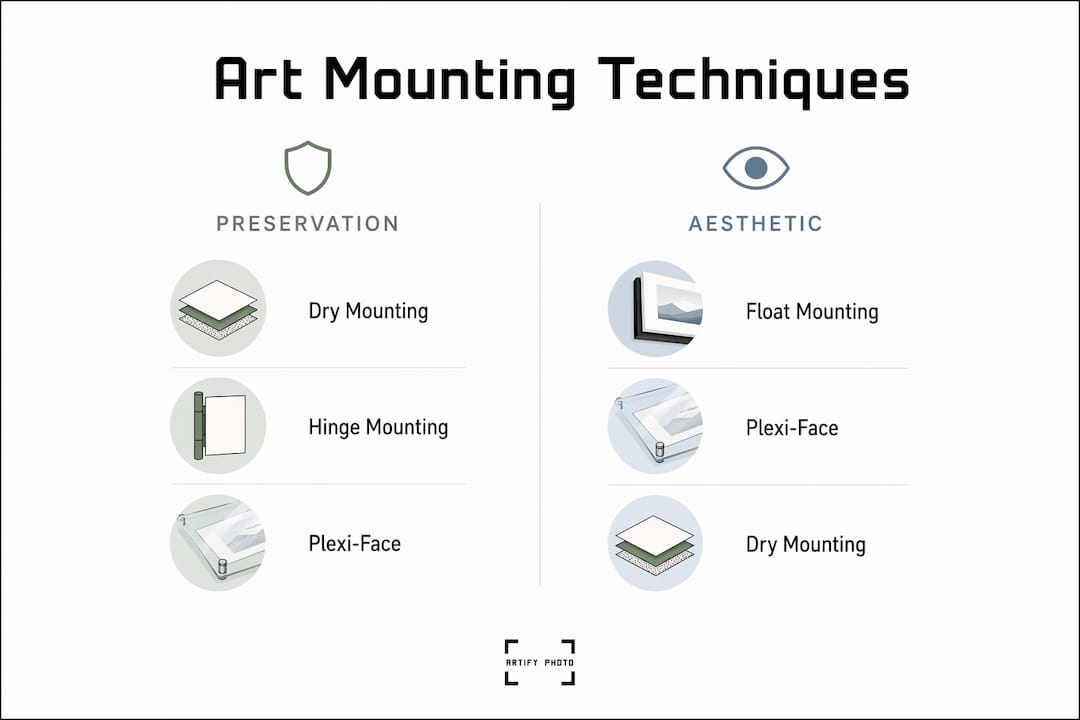
Dry mounting
Dry mounting uses heat-activated adhesive tissue to bond artwork permanently to a rigid backing board. The result is a perfectly flat surface with no ripples or bubbles. The trade-off is permanence. Dry mounting is best suited only for low-value prints because the non-archival adhesives make removal impossible without damaging the piece. Never dry mount an original artwork or anything with sentimental or monetary value.
Hinge mounting
Hinge mounting attaches artwork using small strips of Japanese tissue paper and wheat starch paste or a reversible adhesive. The hinges attach only along the top edge of the piece, allowing the paper to expand and contract naturally with humidity changes. Attaching hinges on all sides causes buckling or tearing over time. This method is the gold standard for valuable originals because it is fully reversible and leaves no permanent mark on the artwork.
Float mounting
Float mounting creates the illusion that a painting is hovering above the backing, enhancing modern display aesthetics while protecting the edges. It requires acid-free foam core backing, mounting strips only along the top to allow natural paper movement, and a deep rabbet frame to prevent glazing contact. The visual effect is striking, especially for contemporary prints and photographs displayed in minimalist interiors. For a deeper look at how mounting choices interact with frame selection, the framed art selection guide from Artify covers the full decision process.
Plexi-face mounting
Plexi-face mounting bonds a photograph or print directly to the back of a sheet of acrylic (plexiglass). The result is a glossy, gallery-style presentation with vivid color depth. This method is popular for large-format photography and modern wall art. It is permanent and not suitable for originals, but it produces a high-impact display that works well for bold, decorative pieces.
| Method | Permanence | Aesthetic effect | Best for |
|---|---|---|---|
| Dry mounting | Permanent | Flat, clean | Low-value prints |
| Hinge mounting | Reversible | Traditional, framed | Originals, valuable works |
| Float mounting | Reversible | Modern, depth effect | Contemporary prints, photos |
| Plexi-face mounting | Permanent | Glossy, gallery-style | Large-format photography |
What materials do you need for art mounting?
The single biggest mistake home decorators make is using whatever backing board or tape is on hand. Non-archival foam boards can cause yellowing or deterioration within 1–2 years. That means a piece you mounted carefully can look damaged in less time than it takes to repaint a room.
The right art mounting materials are not expensive, but they are specific. Here is what you need for safe, lasting results:
- Acid-free mat board or foam core: The backing that touches your artwork must be pH-neutral. Standard foam board from a craft store is not acid-free unless labeled as such.
- Archival mounting tape or Japanese tissue hinges: Use these for reversible attachment. Regular tape yellows, hardens, and tears paper fibers over time.
- Microfiber cloth: Use it to clean the artwork surface and the backing before assembly. Dust and oils trapped under glass accelerate deterioration.
- Framing tabs or turn buttons: These hold the backing board inside the frame. Metal tabs are standard.
- Soft, clean work surface: A padded mat or clean towel protects artwork during handling.
Effective mounts distribute weight and provide support without complex or invasive attachments, simplifying removal and preservation. That principle guides every material choice above. For guidance on matching backing materials to specific frame types, Artify’s sizes and framing help page provides practical reference points.
Pro Tip: Always check that foam core and mat board carry an archival or conservation-grade label before purchasing. The words “acid-free” on the packaging are not enough unless the product also specifies lignin-free construction.
How do you mount art at home, step by step?
Mounting can be completed in 10–15 minutes on a soft, clean surface with proper technique. The key is preparation. Rushing the setup causes the most common beginner errors.
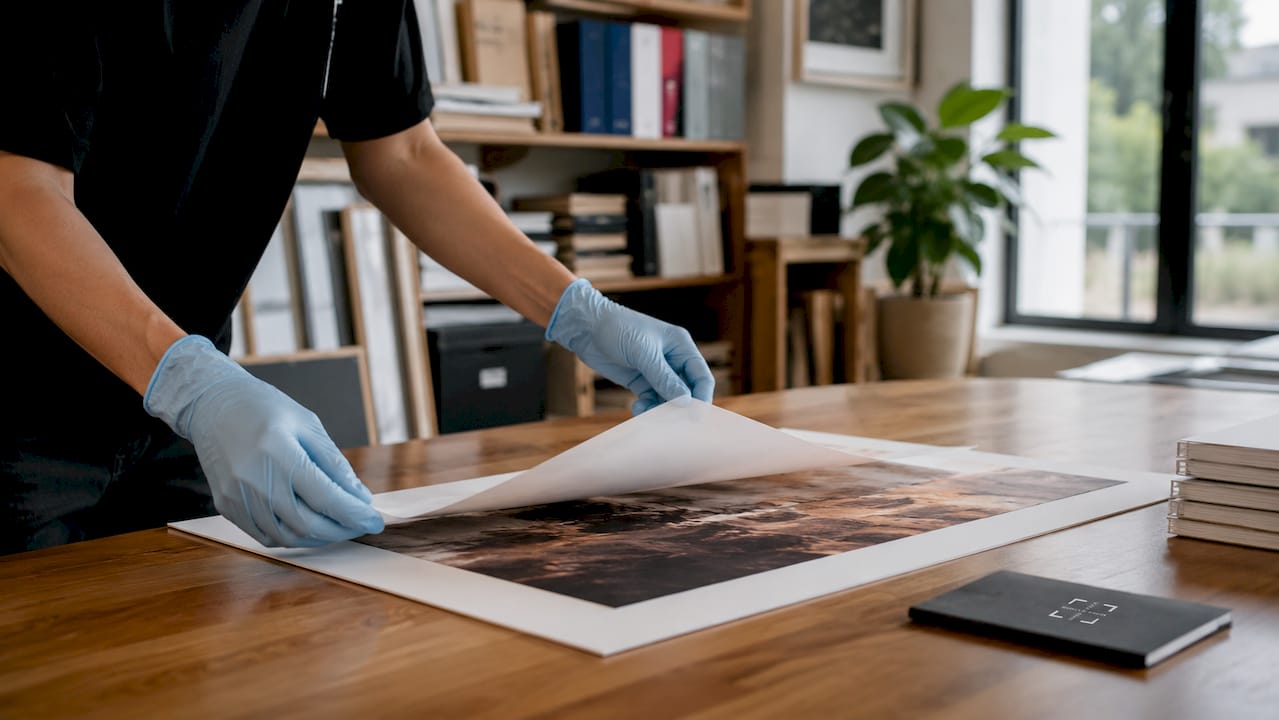
- Prepare your workspace. Lay a clean, soft surface on a flat table. Gather your acid-free mat board, archival tape or tissue hinges, microfiber cloth, and frame. Wash your hands or wear cotton gloves.
- Clean the artwork and backing. Use a dry microfiber cloth to remove dust from both surfaces. Never use liquid cleaners on paper-based artwork.
- Position the artwork on the backing board. Center it visually, then mark the corners lightly with a pencil on the mat board. Do not mark the artwork itself.
- Attach hinges along the top edge only. Cut two small strips of Japanese tissue or archival tape. Fold each strip into a T-shape. Attach the horizontal part of the T to the back of the artwork’s top edge, and the vertical part to the backing board. Hinges attached only along the top edge allow the paper to move freely below, preventing stress and buckling.
- For float mounting, position the artwork on acid-free foam core and attach mounting strips only at the top. Use a deep rabbet frame so the glazing does not press against the artwork surface.
- Insert the mounted artwork into the frame. Place the glass or acrylic first, then the mat (if using one), then the mounted artwork, then the backing board.
- Secure the backing with framing tabs. Bend metal framing tabs straight up and down rather than twisting them repeatedly. Repeated twisting causes metal fatigue, which loosens the backing and allows dust and insects inside the frame.
- Seal the back of the frame. Apply framing tape around the perimeter of the backing board to seal out dust and humidity.
Pro Tip: If you are mounting a piece you plan to reframe or move in the future, use wheat starch paste for your hinges instead of pressure-sensitive tape. Wheat starch paste is fully reversible with moisture and is the same method used by professional conservators.
For more detailed guidance on getting started with framing at home, Artify’s getting started resource covers the full process from material selection to final assembly.
What are the benefits of art mounting for home display?
Mounting artwork before framing it is not optional for pieces you want to last. The benefits of art mounting go beyond aesthetics, though the visual improvement alone is significant.
Protection from physical damage is the most direct benefit. An unmounted print shifts inside its frame, rubbing against the glass and the mat. That friction causes surface abrasion and eventually damages the image layer. A properly mounted piece stays fixed in position for the life of the frame.
Preservation of color and paper integrity depends heavily on the materials used. Any backing material is not automatically safe. Conservators insist on stable, archival materials to avoid contaminant migration that causes irreversible artwork damage. Acid migration from non-archival boards turns white paper yellow and makes it brittle within a few years.
Visual presentation improves dramatically with mounting. A flat, centered piece reads as intentional and finished. A warped or shifted piece reads as neglected, regardless of the artwork’s quality. Float mounting in particular adds a layer of visual sophistication that works well with contemporary wall art and modern interior styles.
The decision about which method to use comes down to three factors: the artwork’s value, how long it will be displayed, and whether you may want to reframe it later. Use reversible, archival methods for originals and anything with sentimental value. Permanent methods are acceptable for decorative prints you plan to display indefinitely without moving. When in doubt, consult a professional framer who follows conservation standards.
Key Takeaways
Art mounting is the foundation of safe, lasting artwork display, and choosing archival, reversible methods protects both the piece and its value over time.
| Point | Details |
|---|---|
| Definition of art mounting | Attaching artwork to a secondary support for stability, protection, and display. |
| Reversible vs. permanent methods | Use hinge or float mounting for originals; reserve dry mounting for low-value prints only. |
| Archival materials are non-negotiable | Non-archival foam boards cause yellowing within 1–2 years; always use acid-free, lignin-free materials. |
| Hinge placement prevents damage | Attach hinges only along the top edge so paper can expand and contract without buckling. |
| DIY mounting is achievable | With the right materials and technique, mounting takes 10–15 minutes and protects artwork for decades. |
What I have learned from mounting art the right way
The most common mistake I see is treating mounting as an afterthought. People spend real money on a beautiful print, then grab whatever tape and foam board is nearby. Within two years, the paper has yellowed at the edges and the piece looks like it belongs in a storage box, not on a wall.
Float mounting changed how I think about displaying art at home. The visual depth it creates is genuinely different from a standard framed print. When you see a piece appearing to hover above its backing inside a clean, deep-set frame, it reads as gallery-quality regardless of the artwork’s price point. That effect is entirely a function of the mounting method, not the artwork itself.
My strongest advice for anyone mounting originals: never use a permanent method. Even if you are certain you will never reframe the piece, circumstances change. Artwork gets damaged, frames break, and tastes evolve. A reversible hinge mount costs the same as a permanent one and gives you every option in the future. Irreversible methods close doors you may want open later.
The archival material rule applies even in casual settings. A print you bought for a guest room still deserves acid-free backing. The cost difference between archival and non-archival foam core is minimal. The difference in how long your artwork looks good is measured in decades.
— Artify
Ready to display art that lasts
Artify brings together curated collections and quality framing options so you can put great art on your walls with confidence.
Artify’s pre-made collections are printed on archival-grade materials and ready to frame, so the preservation work is already done before the piece reaches your home. Each collection spans styles from bold contemporary prints to landmark-inspired photography, giving you a starting point that fits your space. If you want to understand how Artify’s process works from selection to delivery, the how it works page walks through every step. Good mounting starts with quality materials, and Artify builds that standard into every piece it produces.
FAQ
What is art mounting in simple terms?
Art mounting is the process of attaching artwork to a backing board or support to keep it flat, stable, and protected inside a frame. It prevents shifting, warping, and physical damage over time.
What is the best mounting method for original artwork?
Hinge mounting is the best method for original artwork because it is fully reversible and uses archival materials that do not damage the piece. Attaching hinges only along the top edge allows the paper to expand and contract naturally.
Can I mount art at home without professional tools?
Yes. Basic hinge mounting requires only acid-free mat board, archival tape or Japanese tissue, a microfiber cloth, and a clean work surface. The process takes 10–15 minutes with proper preparation.
What happens if I use non-archival materials?
Non-archival foam boards and tapes cause acid migration, which yellows paper and makes it brittle. This damage can appear within 1–2 years and is irreversible once it sets into the paper fibers.
What is float mounting and when should I use it?
Float mounting positions artwork above an acid-free foam core backing so it appears to hover inside the frame. It works best for contemporary prints and photographs where a modern, gallery-style presentation is the goal.