

Framing a cherished print or photograph can be as rewarding as choosing the art itself. Many Canadian and American home decor lovers quickly discover that the right frame and quality materials protect an artwork’s beauty for years. This guide shares conservation-grade options and easy-to-follow measurement tips so you can highlight your favorite pieces while preserving them in top condition for your personal gallery.
Table of Contents
- Step 1: Gather Materials And Measure Artwork
- Step 2: Select Frame And Prepare Workspace
- Step 3: Mount Artwork And Secure In Frame
- Step 4: Inspect Framing And Finish Display
Quick Summary
| Key Point | Explanation |
|---|---|
| 1. Gather Materials for Framing | Collect artwork, frame, mat board, backer board, and glass/acrylic for a professional finish. |
| 2. Measure Artwork Accurately | Precise measurements of height and width are crucial for selecting the right frame and mat size. |
| 3. Use Conservation-Grade Materials | Choose high-quality acid-free mat boards and backing to protect your artwork over time. |
| 4. Prepare a Clean Workspace | Ensure your workspace is clear of dust and clutter to prevent damage during the framing process. |
| 5. Conduct a Final Inspection | Check glass, mat alignment, and hanging hardware for a polished, gallery-quality display. |
Step 1: Gather materials and measure artwork
Before you pick up a hammer or pull out your wallet for a frame, you need to know what you’re working with and what you’ll need. This step sets the foundation for the entire framing process. Gathering the right materials and taking accurate measurements prevents costly mistakes down the road.
Start by assembling everything you’ll use for framing. You’ll need the artwork itself, a picture frame, mat board, backer board, and glass or acrylic to protect the piece. Think of these elements as a team that works together to showcase and preserve your art. Each component plays a role in both the visual appeal and the longevity of your framed piece.
Next, focus on accurate measurement. Measure your artwork’s height and width carefully using a ruler or measuring tape. Write down these numbers in both inches and centimeters to avoid confusion later. Artwork dimensions are the starting point for everything else. The frame size, mat opening, and border spacing all depend on getting this right.
When selecting materials, prioritize conservation-grade options like 100% cotton rag mat boards and archival backing boards. These materials protect your artwork from acid damage and deterioration over time. Cheaper alternatives might save money upfront but can harm valuable pieces.
Here’s a summary of essential conservation-grade framing materials and why they matter:
| Material Type | Recommended Option | Key Benefit |
|---|---|---|
| Mat Board | 100% Cotton Rag | Prevents acid damage |
| Backer Board | Archival Foamcore | Supports and preserves art |
| Glass/Acrylic | UV-Protective Acrylic | Shields artwork from light |
| Spacers | Acid-Free Plastic/Mat Strips | Controls airflow, prevents contact |
Consider mat border sizing as well. A proper mat should overlap the artwork edges slightly to keep everything secure and prevent the piece from shifting. Standard border widths range from 2 to 4 inches, though this varies based on frame size and personal preference.
Taking time to measure accurately and choose conservation materials now saves you from damage, remounting, or replacement later.
Pro tip: Create a simple worksheet with your artwork dimensions and note the mat board thickness you prefer (typically 4-ply or 8-ply) so you have one reference sheet when shopping for frame materials.
Step 2: Select frame and prepare workspace
Choosing the right frame and setting up a clean workspace are equally important. Your frame is the first thing people see, while your workspace determines how well the entire project turns out. Getting both right makes the assembly process smoother and the final result more professional.
When selecting a frame, think about how it complements your artwork. The frame style, wood profile, and finish should enhance the piece without competing for attention. A modern minimalist print needs a different frame than a traditional landscape photograph. Consider the artwork’s color palette, style, and the room where it will hang.
Avoid frames made with acidic wood or low-quality materials that can off-gas or damage your artwork over time. Conservation framing principles recommend selecting materials that protect the piece while enhancing its appearance. Quality frames cost more upfront but preserve your art for decades.
Compare common frame material types for longevity and appearance:
| Frame Material | Durability | Common Look |
|---|---|---|
| Solid Wood | High, long-lasting | Classic, traditional |
| Metal | Excellent, rigid | Sleek, modern |
| Composite MDF | Moderate, affordable | Uniform, painted styles |
| Plastic | Low, least durable | Casual, budget-friendly |
Now prepare your workspace. You need a clean, flat surface with plenty of room to lay out materials and work comfortably. Clear away clutter, dust, and any contaminants that could get on your artwork. A kitchen table works fine, though a dedicated craft table is ideal if you have the space.
Organize your tools and materials before you start. Here’s what you should have accessible:
- Framing tools (mallet, chisel, or frame assembly kit)
- Measuring tools (ruler, measuring tape)
- Cutting supplies (mat cutter if needed)
- Adhesive and fasteners
- Glass or acrylic and cleaning supplies
- Your artwork, frame, mat, and backer board
A prepared workspace prevents mistakes, protects your artwork, and makes the entire framing process faster and more enjoyable.
Pro tip: Lay down a protective cloth or kraft paper on your work surface to catch dust and prevent accidental scratches or marks on your frame and materials.
Step 3: Mount artwork and secure in frame
This is where your artwork transitions from a loose piece to a professionally framed display. Mounting and securing it properly ensures stability, protects the piece, and creates that polished gallery look. The key is using gentle, reversible methods that won’t damage your art.
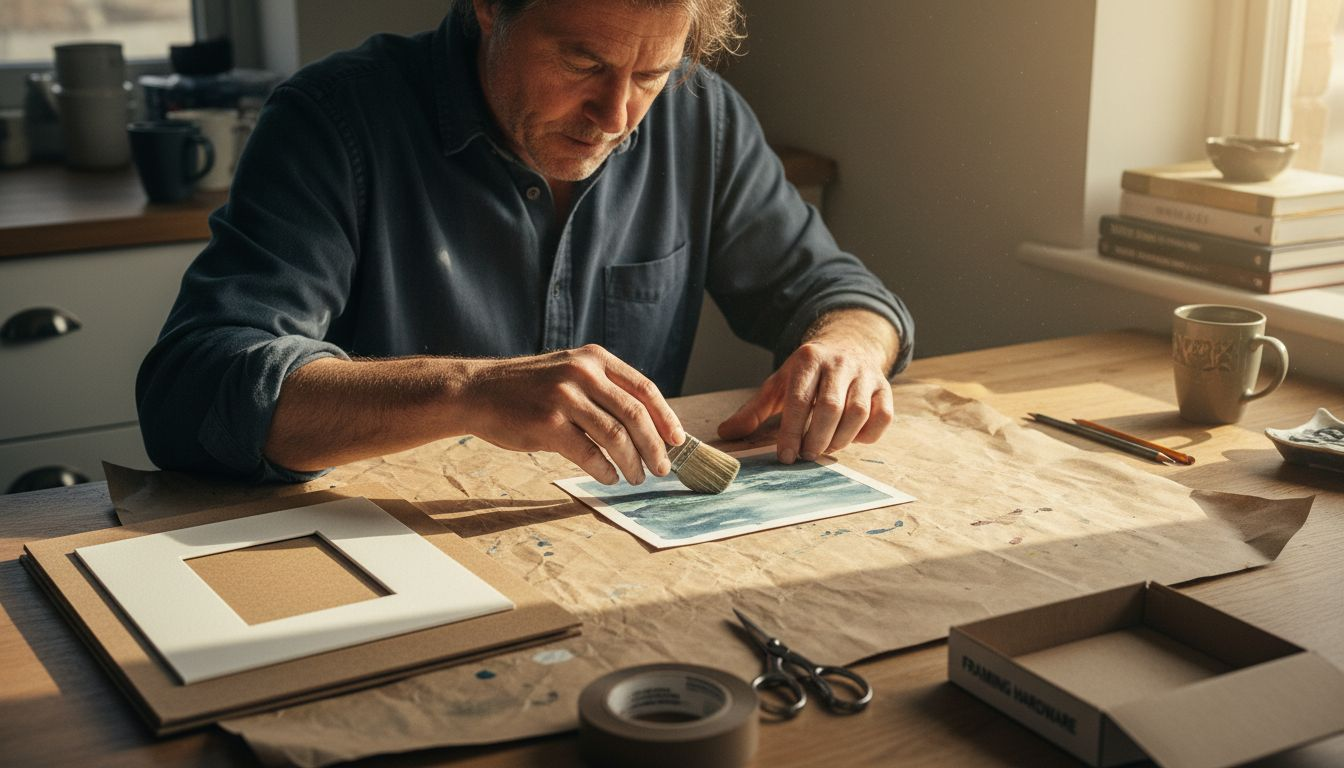
Start by ensuring your artwork is clean and flat. Remove any dust with a soft brush or cloth, then lay the piece on your clean workspace. If it has any creases or wrinkles, gently flatten it under a heavy book for a few hours before proceeding.
Choose your mounting method based on the artwork type. Conservation-grade mounting methods like archival tape hinges or Japanese paper hinges are reversible and won’t harm the piece. These methods secure the artwork while allowing it to be removed if needed in the future.
Position the artwork carefully within the mat opening. The piece should sit flat and centered, with the mat slightly overlapping the edges to hold it in place. Check that nothing touches the glass, as this prevents damage from condensation and direct contact.
Now secure everything into the frame. Follow these steps:
- Place the mat with mounted artwork into the frame
- Add the backer board behind the artwork for support
- Insert spacers if needed to keep the glass away from the artwork
- Secure all layers using frame tabs, nails, or backing points
- Attach the hanging hardware to the back
Gentle handling and proper spacing keep your artwork safe while creating a display that looks intentional and professional.
Pro tip: Use acid-free spacers or mat board strips between the artwork and the glass to maintain airflow and prevent moisture buildup that can damage prints or photographs over time.
Step 4: Inspect framing and finish display
You’re almost there. Before your framed artwork goes on the wall, take time to inspect every detail and ensure the finished piece meets professional standards. This final quality check prevents disappointment and ensures your frame is ready to display with confidence.
Start by examining the glass or acrylic surface for scratches, dust, or fingerprints. Hold it up to light and look at different angles. Even small imperfections become visible once the frame is hanging. Use a microfiber cloth to gently clean the glass if needed, taking care not to disturb the artwork beneath.
Check the mat alignment next. The mat should be perfectly centered over the artwork with even spacing on all sides. The mat opening should frame the piece attractively without gaps or shifts. Look through the mat window from different angles to confirm everything sits flat and secure.
Inspect wire hanging systems and frame stability carefully. The wire should be securely attached to both sides of the frame and properly rated for the frame’s weight. Gently shake the frame to ensure nothing rattles or moves inside. Test the stability by hanging it temporarily to see how it performs.
Verify that your spacers and protective elements are doing their job. The artwork should not touch the glass anywhere. Look for any dust particles trapped inside that you can remove before final sealing. Once sealed, any dust becomes permanent.
Here’s your final inspection checklist:
- Glass is clean and scratch-free
- Mat is centered and properly aligned
- Artwork sits flat without shifting
- Nothing contacts the glass
- Hanging hardware is secure and rated for weight
- Frame is sturdy with no wobbling
- No dust or debris visible inside
A thorough final inspection ensures your framed artwork looks gallery-quality and remains protected for years.
Pro tip: Take a photo of your finished frame before hanging it; this creates a record for insurance purposes and helps you recreate the look if you ever need to reframe the artwork.
Elevate Your Art Framing Experience with Professional Solutions
Framing artwork can be challenging when you want to ensure every detail is perfect—accurate measurements, conservation-grade materials, and the right frame choice all matter. The article highlights common pain points like selecting acid-free mats, securing artwork without damage, and achieving gallery-quality finishes. Avoid the stress of mounting and framing by trusting expert craftsmanship that honors your art just like you do.
Discover how Artify transforms your photos into premium custom wall art with professional framing that meets conservation standards. Whether you prefer framed prints or canvas wraps, we provide museum-grade quality that preserves and showcases your artwork beautifully. Don’t risk damage or uneven results—visit Artify now to create your perfect framed piece and bring your vision to life with confidence.
Frequently Asked Questions
How do I gather materials for framing art?
Begin by collecting your artwork, a picture frame, mat board, backer board, and glass or acrylic. Ensure you have everything on hand to avoid interruptions during the framing process.
What measurements do I need to take for my artwork?
Carefully measure the height and width of your artwork using a ruler or measuring tape. Write these dimensions down in both inches and centimeters to ensure you select the correct frame size and mat opening.
What type of mat board should I use for framing?
Opt for conservation-grade options like 100% cotton rag mat boards, as they prevent acid damage over time. Make sure to choose a thickness that fits your preference, typically 4-ply or 8-ply, before purchasing materials.
How do I securely mount my artwork in the frame?
Use reversible methods, such as archival tape hinges or Japanese paper hinges, to mount your artwork. Position the piece carefully in the mat opening and ensure it is flat and centered before securing it in the frame.
What should I check during the final inspection of the framed artwork?
Inspect the glass for scratches, ensure the mat is centered, and verify that the artwork doesn’t touch the glass. Additionally, check that all hanging hardware is secure and rated for the frame’s weight before hanging it on display.
Can I use a kitchen table for my framing project?
Yes, a kitchen table can work well as a workspace for your framing project. Just make sure to clear away any clutter to provide a clean, flat surface to avoid damaging your materials.